Table Of Contents
First you’ll need to start a new node server. Once it’s done, lets see how to send transactional mails using NodeJS and MailerSend.
The very first thing you need to do is to create an account on the MailerSend website You’ll be asked to accept the terms and conditions of MailerSend and add a sending domain. I will use the domain thehotcode.com as a setup example. Simply follow the domain verification instructions for adding the MailerSend DNS. They’ve written how to do it for all the main domain providers. Thank you MailerSend team for that as sometimes it can be tricky! Once you’re done adding MailerSend DNS to your DNS zones, you need to wait a bit for the MailerSend team to validate it.
Sending your first email in MailerSend using Postman
If you never used Postman, it’s a tool that let you send quick API call. You can install their software or directly use the web version of it without installing everything. Simply go to the Postman website, create an account, and open the web version and you’re ready to send your first API call!
In Postman, create a new POST request to https://api.mailersend.com/v1/email.
Go to Authorization > Bearer Token and past your Mailersend token here, you should have that :

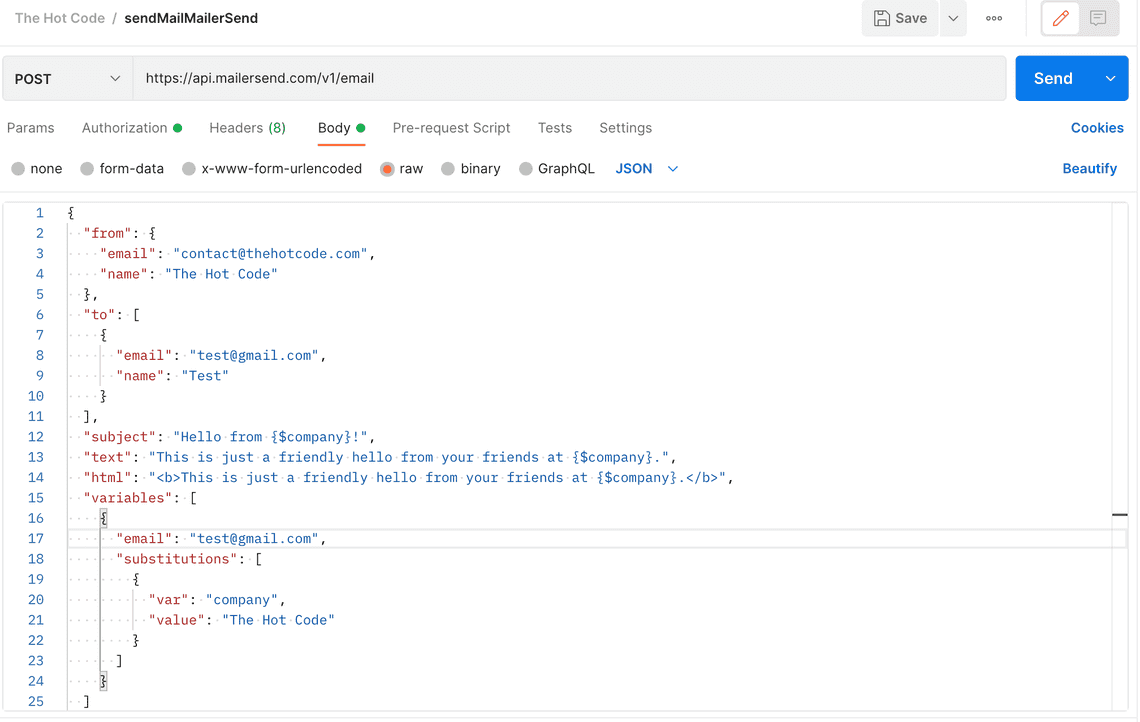
Go to the Body Page, set RAW content and JSON, and paste this:
{"from": {"email": "contact@thehotcode.com","name": "The Hot Code"},"to": [{"email": "test@gmail.com","name": "Test"}],"subject": "Hello from {$company}!","text": "This is just a friendly hello from your friends at {$company}.","html": "<b>This is just a friendly hello from your friends at {$company}.</b>","variables": [{"email": "test@gmail.com","substitutions": [{"var": "company","value": "The Hot Code"}]}]}
Change test@gmail.com with your mail address, same for the company.
You should have that :

Hit Send and you should have a positive response 202 from Postman. Check your inbox, the mail should be here!
Sending your first custom template email in MailerSend using Postman
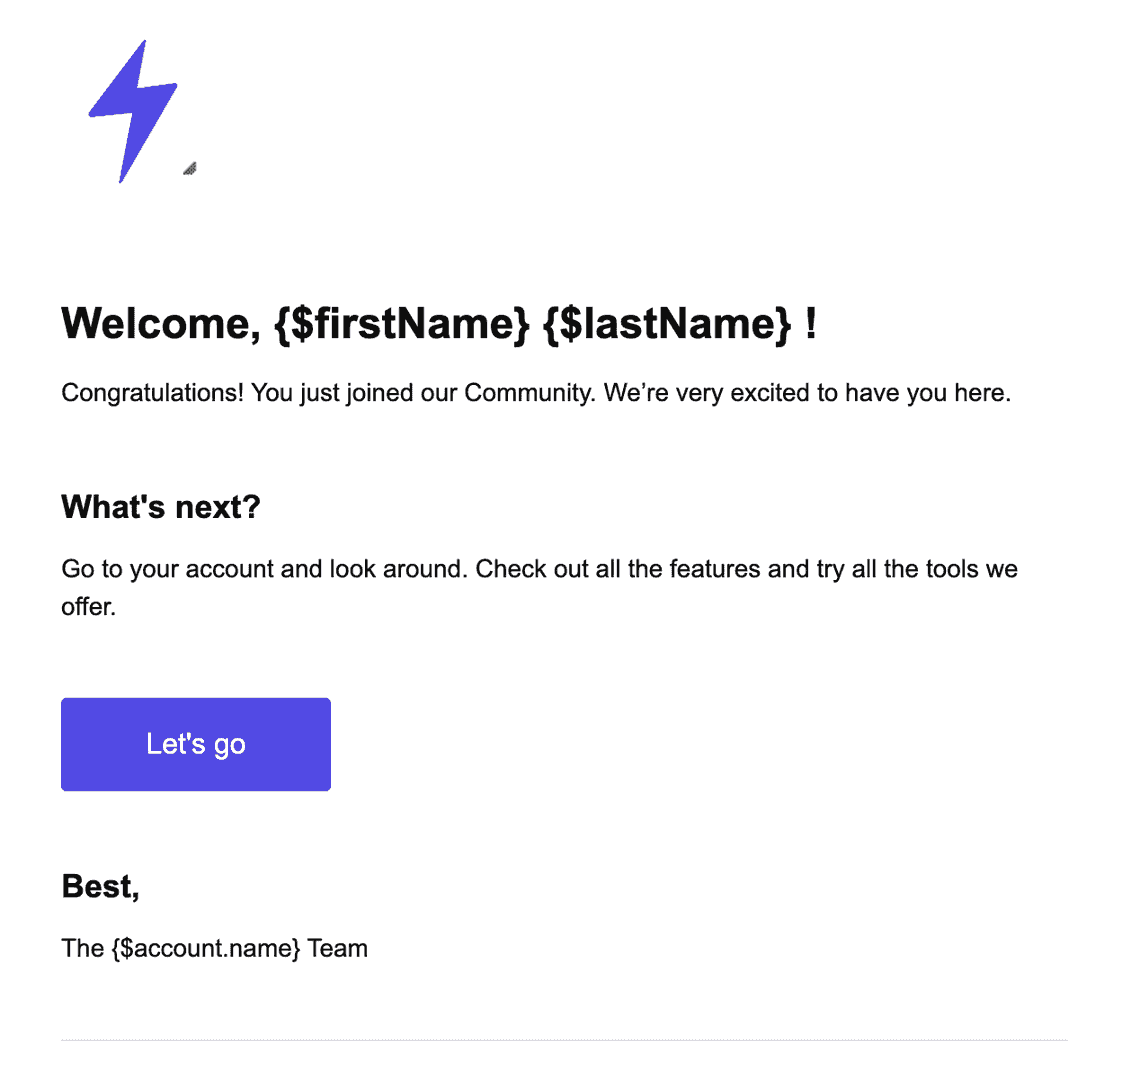
In MailerSend, Go to your template page and create a template with custom value {$firstName} and {$lastName}. I suggest that you use the Drag & Drop editor MailerSend built, it’s really simple to use for quickly creating a design!
You should have something like this:

Hit Save and publish, copy your generated template ID from MailerSend. Head back to Postman and this time in the body paste this (change mail and paste your template ID) :
{"from": {"email": "contact@thehotcode.com"},"to": [{"email": "test@gmail.com","name": " test"}],"template_id": "YOUR_TEMPLATE_ID","variables": [{"email": "test@gmail.com","substitutions": [{"var": "firstName","value": "John"},{"var": "lastName","value": "Do"}]}]}
Hit send, this time you will receive a mail looking like a template you customized in MailerSend! Congratulation! MailerSend is now all set up to be used with your NodeJS server!
Sending your first custom template email in MailerSend using NodeJS and Axios
I assume here that you have a working NodeJS project.
First, we’ll need to add Axios to the project, to do so :
npm install axiosORyarn add axios
Then add this function to your NodeJS project :
import axios from 'axios';const sendEmailToUser = async ({ substitutions, email, templateID }) => {return await axios({method: 'post',url: mailerSendURL,data: {from: {name: 'The Hot Code',email: 'contact@thehotcode.com',},to: [{email,},],template_id: templateID,variables: [{email,substitutions: substitutions,},],},headers: {'Content-Type': 'application/json','Authorization': `Bearer ${MAILERSEND_TOKEN}`,},}).then((response: any) => {functions.logger.log('email sent', response);}).catch((error: any) => {functions.logger.error(error);});};///Calling the function :const mailInfo = {email: 'test@gmail.com'templateID: 'TEMPLATE_ID'substitutions: [{var: 'firstName',value: 'John'},{var: 'lastName',value: 'Do'}]}sendEmailToUser(mailInfo);
Start your nodeJS server, it should send the mail with the information you provided. You now have a reusable function that can be used by the server to send a custom templated email to your users with MailerSend! Congratulation!
Sending your custom template email in MailerSend using NodeJS and MailerSend custom NodeJS package
MailerSend is providing a custom NodeJS package to use directly to send mail.
First, we’ll need to add the custom MailerSend NodeJS package to the project, to do so :
npm install mailersendORyarn add mailersend
Then in your nodeJS server add :
const Recipient = require("mailersend").Recipient;const EmailParams = require("mailersend").EmailParams;const MailerSend = require("mailersend");const mailersend = new MailerSend({api_key: "key",});const recipients = [new Recipient("your@client.com", "Your Client")];const variables = [{email: "your@client.com",substitutions: [{var: "firstName",value: "John",},{var: "lastName",value: "Do",},],},];const emailParams = new EmailParams().setFrom("contact@thehotcode.com").setFromName("The Hot Code").setRecipients(recipients).setVariables(variables).setTemplateId("templateId");mailersend.send(emailParams);
Start your nodeJS server, it should send the email to the address you provided!
We saw two different methods to send custom emails with MailerSend. The one you prefer is up to you.
Making MailerSend variables cleaner
This part is not mandatory at all. I liked to push things a bit further. I’m not a huge fan of how we need to provide custom data variables in substitutions like this :
const variables = [{email: "your@client.com",substitutions: [{var: "firstName",value: "John",},{var: "lastName",value: "Do",},],},];
I’ve written a small function to provide objects that will be auto-formatted to MailerSend requirements :
const formatSubstitionsForMailerSend = (substitutions: any) => {const substitutionsFormatted = [];for (const [key, value] of Object.entries(substitutions)) {substitutionsFormatted.push({ var: key, value: value });}return substitutionsFormatted;};
To use it, now in the Axios call the function should look like this :
const sendEmailToUser = async ({ substitutions, email, templateID }: SendMailUser) => {return await axios({method: "post",url: mailerSendURL,data: {from: {name: "The Hot Code",email: "contact@thehotcode.com",},to: [{email,},],template_id: templateID,variables: [{email,substitutions: formatSubstitionsForMailerSend(substitutions),},],},headers: {"Content-Type": "application/json",Authorization: `Bearer ${MAILERSEND_TOKEN}`,},}).then((response: any) => {functions.logger.log("email sent", response);}).catch((error: any) => {functions.logger.error(error);});};const substitutions = { firstName: "John", lastname: "Do" };
This enhancement is personal and not mandatory for using MailerSend API.
We can wrap it up here, we’ve seen in-depth how to send custom mail templates in NodeJS using MailerSend. It can be performed using Axios or the MailerSend custom NodeJS package. The setup in Postman will help you quickly debug and test templates if need be.
A personal thanks to the MailerSend team for their product, it’s very polished and production-ready! With it you don’t need to bother about domain reputation or deliverability for your mails, it’s a setup and forget that I enjoy using.
